Facebook is a powerful social media platform that connects billions of people worldwide, allowing them to share their thoughts, photos, and life experiences with friends and family. As we grow and evolve, so do our online identities – and sometimes that means updating our Facebook names to reflect the person we’ve become. Whether you’re going through a major life change or simply want to switch things up, changing your Facebook name can be a quick and easy process. In this article, we will guide you through the steps of how to change your Facebook name so that you can showcase your true self on the world’s largest social networking site.
Why changing your Facebook name is important
Changing your Facebook name may seem like a trivial matter, but it can have significant implications for your online presence and personal branding. Your Facebook profile serves as an extension of yourself in the digital world, and having a unique and memorable name is crucial for creating a strong online identity. By changing your Facebook name to something more distinctive or representative of your true self, you can potentially stand out from the crowd and leave a lasting impression on those who come across your profile.
Moreover, changing your Facebook name gives you the opportunity to control how others perceive you. Whether you want to separate your personal and professional life or simply shed an old persona that no longer aligns with who you are, altering your name on this platform allows you to curate the image portrayed publicly. This is especially relevant given that potential employers often search for candidates’ social media profiles during the hiring process. Taking charge of how you are perceived through a simple change of name is an effective way to shape others’ perceptions positively. Furthermore, changing your Facebook name can be empowering as it signifies growth and evolution within oneself. We all undergo changes in our lives – we grow up, acquire new skills, change careers – and embracing these changes is vital for personal development. By updating our online identities on platforms like Facebook, we align our virtual selves with our real-life progression. It’s an opportunity to confidently showcase who we have become while celebrating our personal growth journey with friends old and new.
Step 1: Log in to your Facebook account
Logging into your Facebook account may seem like a straightforward task, but there are a few tips and tricks that can make the process even smoother. Firstly, it’s important to ensure that you have a strong and secure password for your Facebook account. This helps protect your personal information from hackers or unauthorized access. Consider using a combination of letters, numbers, and special characters to create a unique and memorable password.
Additionally, if you find yourself frequently logging in and out of your Facebook account on different devices, enabling the Remember Me feature can save you time. This allows you to stay logged in for an extended period, so you won’t have to enter your login credentials each time you want to access your profile. Lastly, if you’re concerned about the security of logging in from public computers or devices, Facebook offers an extra layer of protection with its two-factor authentication feature. By setting this up, Facebook will send you a unique code via text message each time someone tries to log into your account from an unrecognized device or location.
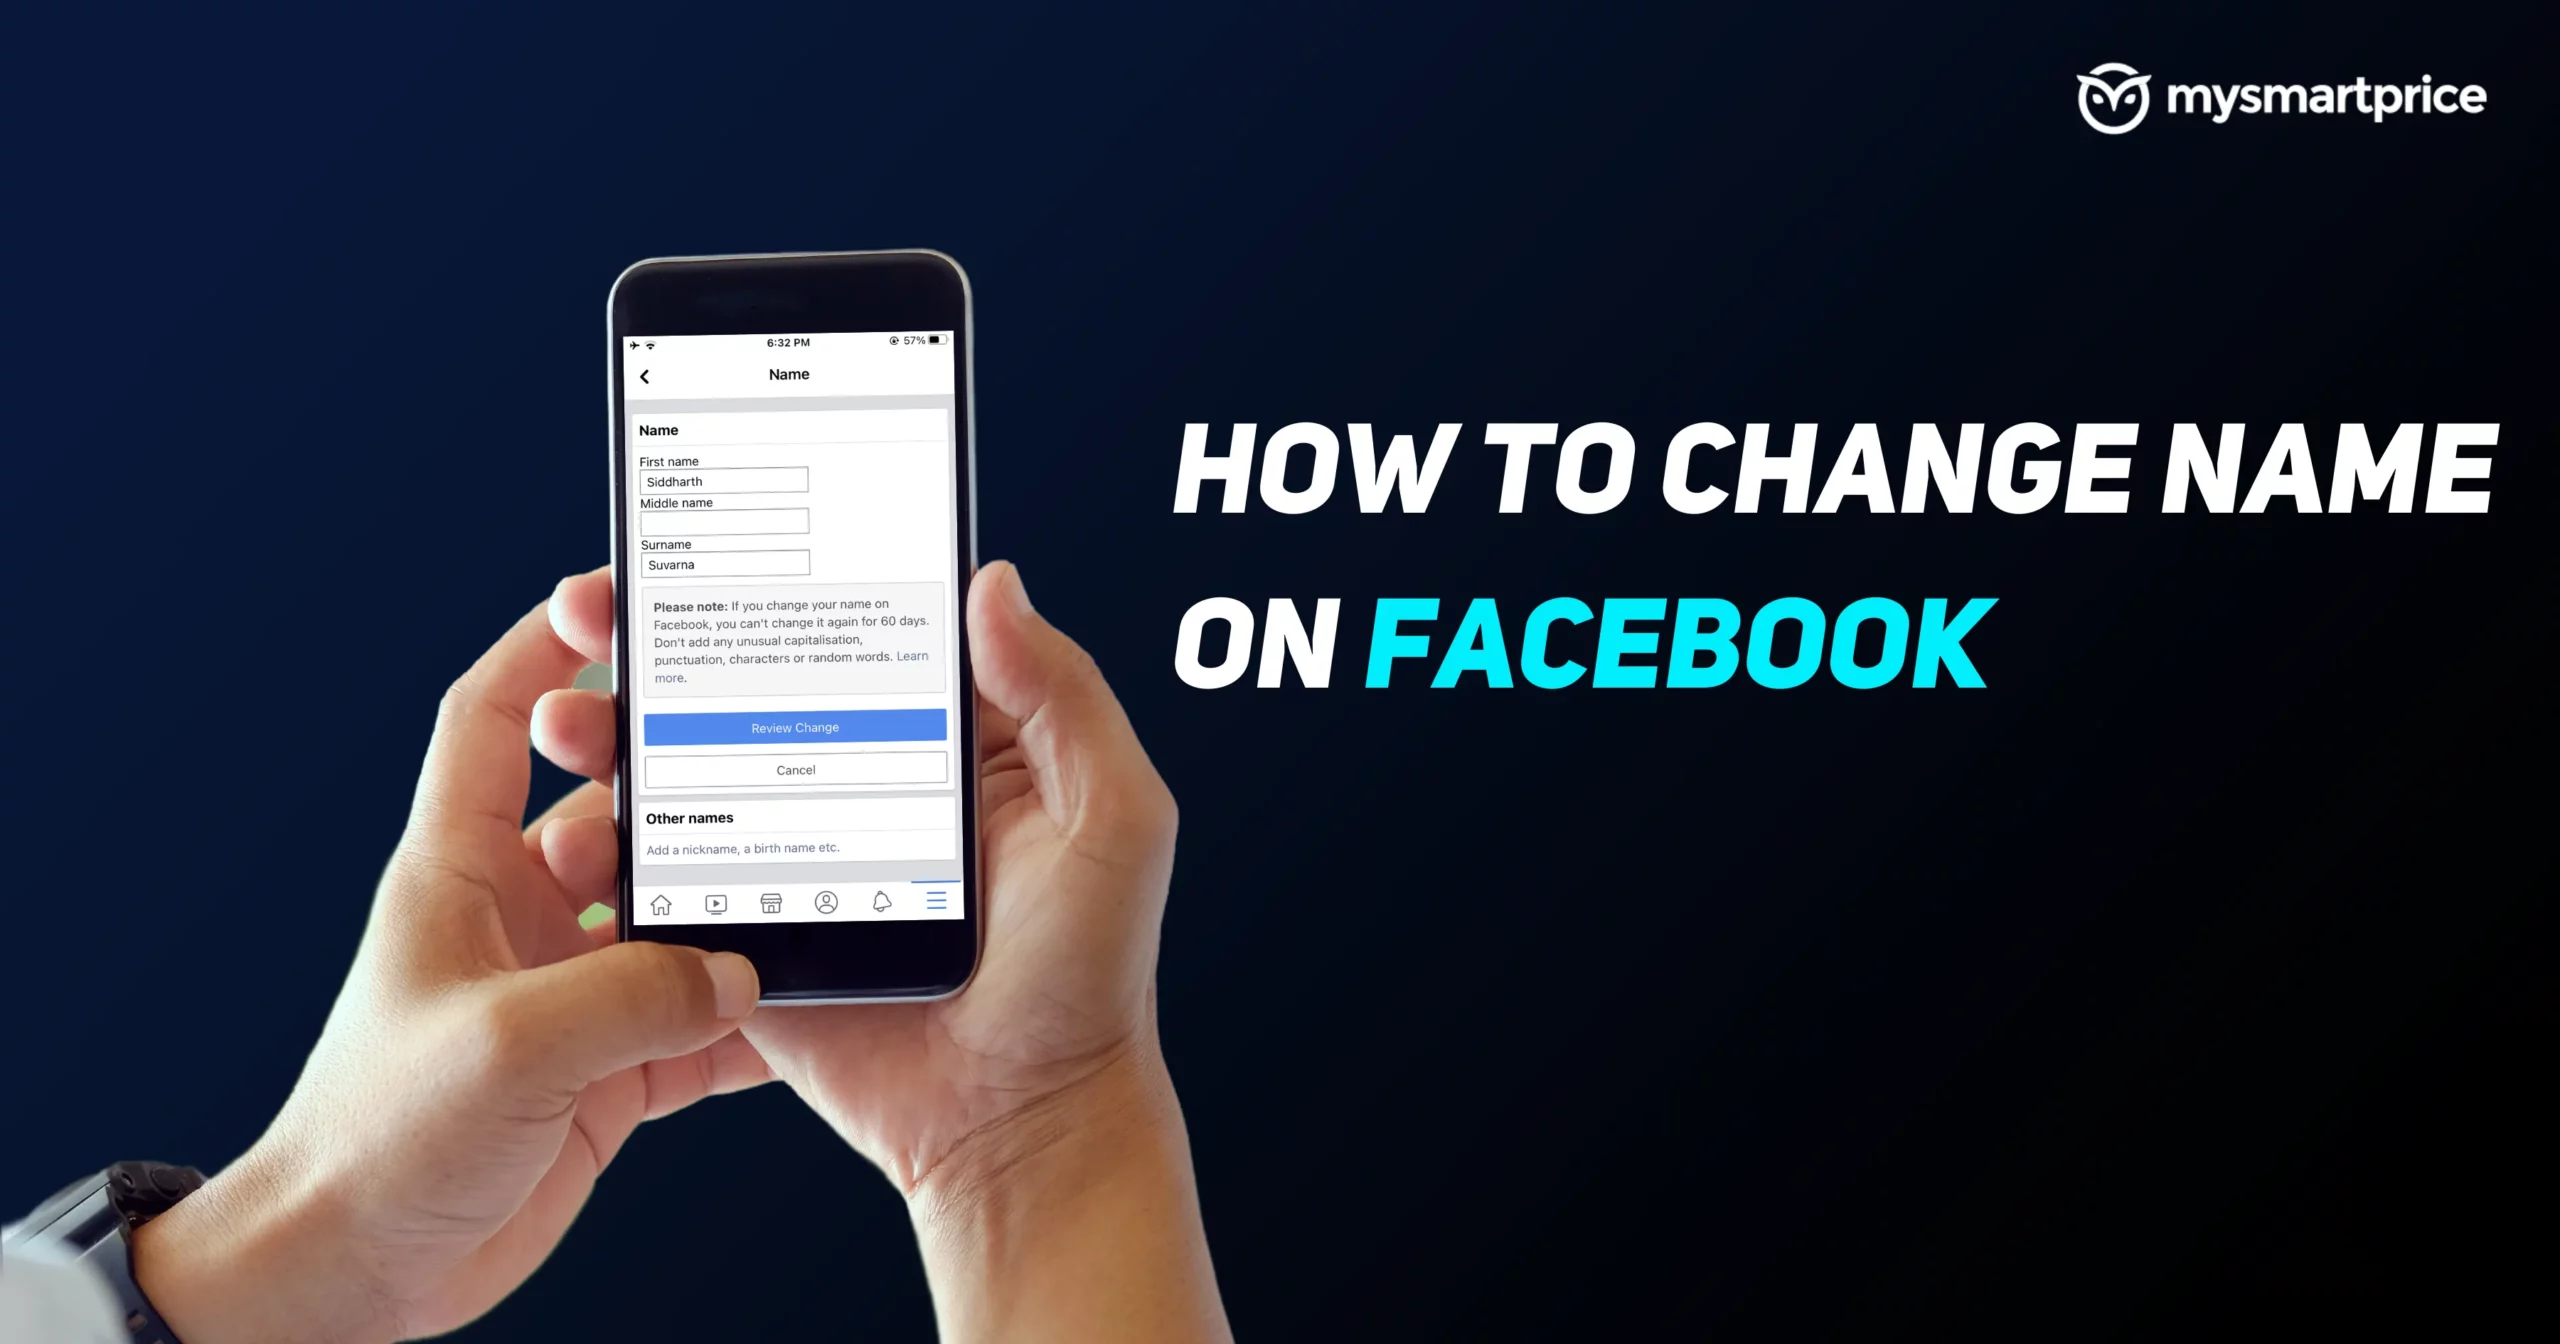
Step 2: Go to the settings page
When it comes to changing your Facebook name, the first step is to go to the settings page. This is where all of the customization options for your profile are located, making it easy to tailor your online presence to best suit you. On the settings page, you’ll find a plethora of tabs and sections that can be somewhat overwhelming at first glance. However, by taking a moment to explore each section and understand its purpose, you’ll soon realize how much power and control you have over your own Facebook experience.
One of the most important things to note on the settings page is that changing your name isn’t just as simple as typing in a new one; there are certain rules and restrictions in place. For instance, Facebook doesn’t allow symbols or special characters in names, nor does it permit using numbers or excessive punctuation. Additionally, Facebook has strict guidelines when it comes to impersonating others or using fake names. By visiting the settings page and familiarizing yourself with these rules, you can ensure that any changes you make adhere to Facebook’s policies.
Step 3: Edit your name
Changing your name on social media platforms like Facebook can be a significant decision. It allows you to personalize your online identity and express yourself in a unique way. While some may find it daunting or unnecessary, editing your name can actually have several benefits.
Firstly, changing your name gives you the opportunity to reinvent yourself and curate the image you want to present to the online world. Whether it’s adopting a new nickname or updating your last name after getting married, altering your name can help establish a sense of self-identity that better reflects who you are today. Moreover, editing your name can also provide a level of privacy protection. Using an alias or only using part of your legal name can help safeguard personal information and make it harder for strangers or acquaintances to track down private details about you online. By choosing how much or how little of your real identity is visible through your name, you regain control over what information is accessible to others.
Step 4: Review and save changes
Review and save changes: Once you have made the desired changes to your Facebook name, it’s important to take a moment to review them before saving. Make sure that everything is spelled correctly and that there are no typos or errors. Remember, your name is how people will identify you on the platform, so it’s crucial to get it right. Take this opportunity to double-check any nicknames or variations of your name that you may use, as well as any capitalization preferences.
After reviewing your changes, click on the Save Changes button. Facebook may prompt you for your password before allowing the update to take effect. This extra step ensures that only authorized users can make changes to their names and helps protect against unauthorized access. Once you have successfully saved your new name, it will be updated on your profile and visible to others on the platform.
Conclusion: Successfully change your Facebook name
Changing your Facebook name may seem like a simple task, but it can have a significant impact on your online presence and personal branding. By following the steps outlined in this article, you can successfully change your Facebook name and ensure that it accurately represents who you are.
One important thing to keep in mind is that once you change your name on Facebook, it may take some time for the changes to reflect across all platforms. This means that while your new name will be visible to your friends and followers on Facebook, it may still appear as your old name on other websites or apps that use Facebook’s data. Another aspect to consider when changing your Facebook name is how it aligns with your personal or professional goals. Your new name should be memorable, easy to pronounce, and relevant to the image you want to project. Make sure it reflects who you are or what you do without compromising privacy or safety concerns.